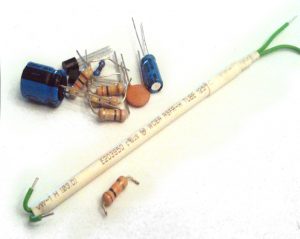
Analog Soil Moisture Sensor
There are a lot of DIY moisture sensor articles out there. They are quite basic in principle. Gardenisto articles assume basic knowledge of programming, microcontrollers, and circuit design. We generally prefer to use the Arduino for our applications, as it is so widely used and supported. Our example code is also written in C, and intended for use on the Arduino.
This article focuses on the principle of analog sensor measuring via the Arduino microcontroller, as well as real world usage in a hydroponic coco coir growing medium.
How does a moisture sensor work? As water saturation increases, so does the conductivity of the soil or growing medium. If a small electric current is applied to one sensor lead, then at some fraction of that current should be measurable on another sensor lead a small distance away.
Galvanized nails are also commonly used, simple and effective, but for our basic moisture sensor, we went a little more compact. Two lengths of insulated steel jumper wires are secured in heat shrink tubing. The ends are left exposed. On one end the exposed leads are bent almost 180 degrees back. Caution should was taken to ensure the bent leads are not in contact with one another.
The wires are inserted into a small diameter aluminum tube, just short enough to leave both ends exposed and workable.
Whilst leaving both ends exposed and workable, wrap and secure heat shrink tubing beyond the full length of the tube. The entire thing should feel rigid. This will allow the sensor to hold up to being moved from location to location, and a little abuse.
Our example keeps the wiring fairly simple. It is possible to over complicate the circuit with transistors, or a power source that flips back and forth to prevent an electroplating effect and corrosion of the sensor leads, but for our example we left it simple.
We did add a variable 100k potentiometer to make minor mechanical adjustments.
We ran the power wire to a digital pin, the ground pin to the ground, and the sensor wire to an analog pin on our microcontroller. Our microcontroller is an Arduino, based on the C programming language. They are inexpensive, and have made professional level hardware interfacing available to any hobbyist.
To check soil moisture, we turn on the digital pin which powers the sensor, and give it a fraction of a second to stabilize. We then take analog readings on our analog pin. The readings are done inside of a loop to gather 20 readings before taking the average.
for (i = 0; i < 20; i++){
  val = val + analogRead(analogMoisture);
}

val = val / 20;    // take average
val = val / 4;    // scale to 8 bits (0 - 255)
The digital power pin for the sensor is then turned off. The result is printed to the serial monitor. The following code was extracted from a larger coding block of a more advanced sensor, and formatted to run independently as a simple Arduino program. Entering ‘2’ into the serial monitor will return readings.
/*

*	Simple analog moisture sensor.

*

*	Leave us a question or comment at http://www.gardenisto.com

*

************************************************************/
int analogMoisture = 0; // pin number of analog moisture sensor readings
int digitalSensorPower = 12; // power up/down pin for sensor readings
int i; // variable used in FOR loops as counter
int val; // variable for reading Moisture status
int intSerialVal = 0;
void setup() {
pinMode(analogMoisture, INPUT);
pinMode(digitalSensorPower, OUTPUT);
Serial.begin(9600);
}
void loop(){
intSerialVal = Serial.read();
if ( intSerialVal == '0') {
digitalWrite(digitalSensorPower, HIGH);
delay(10); // 10 milisecond delay for stability post power on
for (i = 0; i < 20; i++){ val = val + analogRead(analogMoisture); // sensor on analog pin 0 } val = val / 20; // average val = val / 4; // scale to 8 bits (0 - 255) Serial.println(val); // Send Sensor Readings digitalWrite(digitalSensorPower, LOW); } }
So what does the returning value mean? Before using our sensor on our coco coir growing medium, we created a set of controls by measuring cold water, warm water, and air. The values we attained were: H20 cold:149-146, H20 warm:163-161, Air:0. For a healthy plant in our growing environment, we try and let soil cycle between partially dry, and wet but not over watered. We determined our plant health was optimal when the coco coir moisture level was in the 120-127 range after watering.
Of course, there are additional considerations to make, as you'll notice from the controls. The electro conductiviy of water changes with temperature as well as the level of salinity caused by nutrients in the growing medium. I'll expand on these issues in a more advanced post, but for simple moisture monitoring this method is simple and effective.
Tags: analog moisture sensor, arduino, coco coir, hydroponics Comments

Leave a Reply