DIY Hydroponic System with Lighting $30
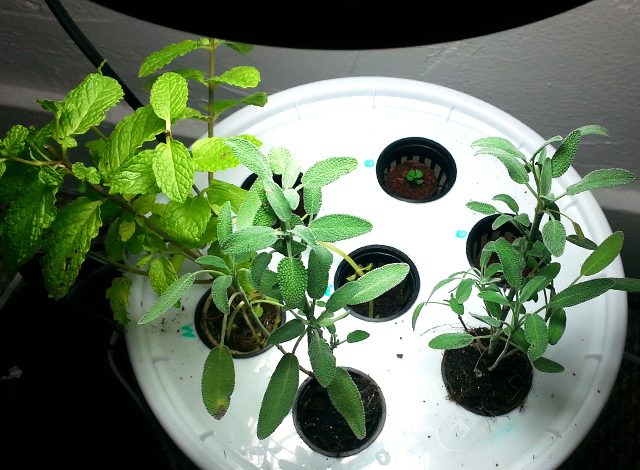
In case you are wondering why it is worth the effort to build such a small garden system, then consider the break-even point. Gardenisto is Southern California based, and our primary contributors don’t really experience this sort of problem, but depending on where you live in the country, some food items are ridiculously expensive, if you can find them at all.
In the location we are building this system, a small bruised or frost damaged, bunch of ‘fresh’ Basil can run just under 4 dollars. So the goal is to build a garden, capable of yielding enough Basil, Mint, Pak Choy, or other micro greens, to break even. The target system cost is 30 dollars, or 7.5 small bunches of Basil.
Container or pots and containers with soil for hand watering
Drip System with soil
Drip System with soil alternative, like perlite, Hydroton, or Rockwool
Deep Water Culture
Flood Drain or Ebb Flow
Wick System
Nutrient Film System or Technique(NFS a.k.a NFT)
The Choice and Reasoning Why
The idea is to create a small garden system with artificial light, capable of growing at minimum of two bunches of Basil, two bunches of mint, and two bunches of pak choy.
Soil is a gateway to unwanted pathogens, insects like fungus gnats, contamination and weeds. Without active care this can destroy plants. Soil systems also need active monitoring and watering either by hand or timers and sensors. This defeats the idea of low or zero maintenance.
Drip systems, ebb flow or flood drain, and nutrient film technique(NFT) solutions require an aerated reservoir, the added complication of a water pumps, and a timers to run the systems. Working out volume and frequency of watering also isn’t for the novice. Should any of the Drip, Flood Drain, or NFT systems fail or need re-calibration, a novice hydroponic gardener will not easily be able to fix it.
NFTs also generally require a larger foot print, and some sort of elevated or tower construction to hold various sizes of plumbing.
In a deep water culture system, an air pump, which is on all the time, is the only expense and technical component, besides lighting. DWCs are easy to maintain, require little to no equipment or technical knowledge, and can be very compact.
So the build will be a DWC, for 6 small plants, that fits within a foot print of 18” by 18”, with an artificial light source.
Tools
We are away from home on this one, so we are limited in terms of tools available.
Scissor, Exacto Knife, Pocket Knife with some survival accessories
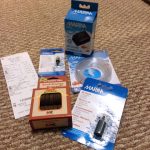
Possible Equipment List Ideas, and Actual Purchases
Lamp
– HDX 150-Watt Incandescent Clamp Light @ Home Depot $8.97
– Brooder style Lamp with Clamp – @ Walmart $6.79 (Actual)
Bulb
– Feit Electric 13W Daylight (5000K) CFL Light Bulb – $6.22 @ Walmart
– GE® Spiral Daylight CFL Bulb – $6.99 @ Ace Hardware
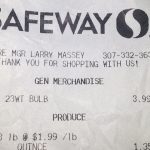
– 23w FEIT Daylight Bulb – 6.00 @ Safeway $3.99(Actual)
Fish Tank Air Pump – $6.00 @ Ace Hardware $5.99(Actual)
Anti-Siphon Valve – $2.00 @ Ace Hardware $2.29(Actual)
6x 2” net pots – $2.40 @ Ebay $2.40(Actual)
Bucket 5gal – @ Home Depot $2.78(Actual)
Bucket Lid – @ Home Depot $1.98(Actual)
Air Stone @ Ace Hardware $.99(Actual)
Growing Medium – Free @ Trash Cans Everywhere
– Wine corks
– Cork board
– Plastic Cups and Bottles (PU Chips)
– Coco Peat Starter Plugs @ Ace Hardware $3.99(Actual)
Total: 31.38 (6.97+3.99+5.99+2.29+2.40+2.78+1.98+.99+3.99)
Setup Instructions
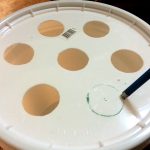
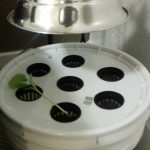
Setting up a 5 Gallon bucket DWC is quite simple. Preferably, we’d have a 2″ hole saw, but we didn’t. So we marked holes for our net pots and very carefully and painstakingly, cut out and trimmed up holes for our net pots with an xacto blade. We also made a hole for our air line to run into the bucket. The rest of these instruction are a bit abbreviated, so for more complete instructions on a DWC setup see our post on just that: Deep Water Culture Basic Setup
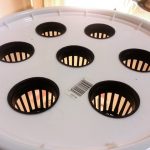
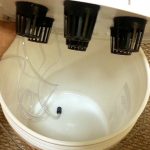
The remaining steps are quite easy. Fill Bucket with water. Attach Lid. Insert net pots and starter plugs with whatever herb seeds will be grown. Screw the light bulb into the lamp. Notice we used a 6500k Daylight Bulb, this provides the necessary color spectrum for healthy plants. Clamp the lamp above the bucket lid at an appropriate height, around 4 to 8 inches. Make sure everything is dry, and no wiring is in any sort of contact with water.
Finally, plug and play! Now we have a compact hydroponic herb garden, with enough lighting to grow bunches of basil, micro greens, other herbs, or compact leafy greens. Please leave us your questions or comments if you have any.

Leave a Reply